This example uses:
I cannot find any organisation selling the interface leads so this page describes how to make your own.
Its not possible to connect the radio speaker output directly to the iPad microphone input, an adapter lead is necessary.
The lead should be wired up as follows
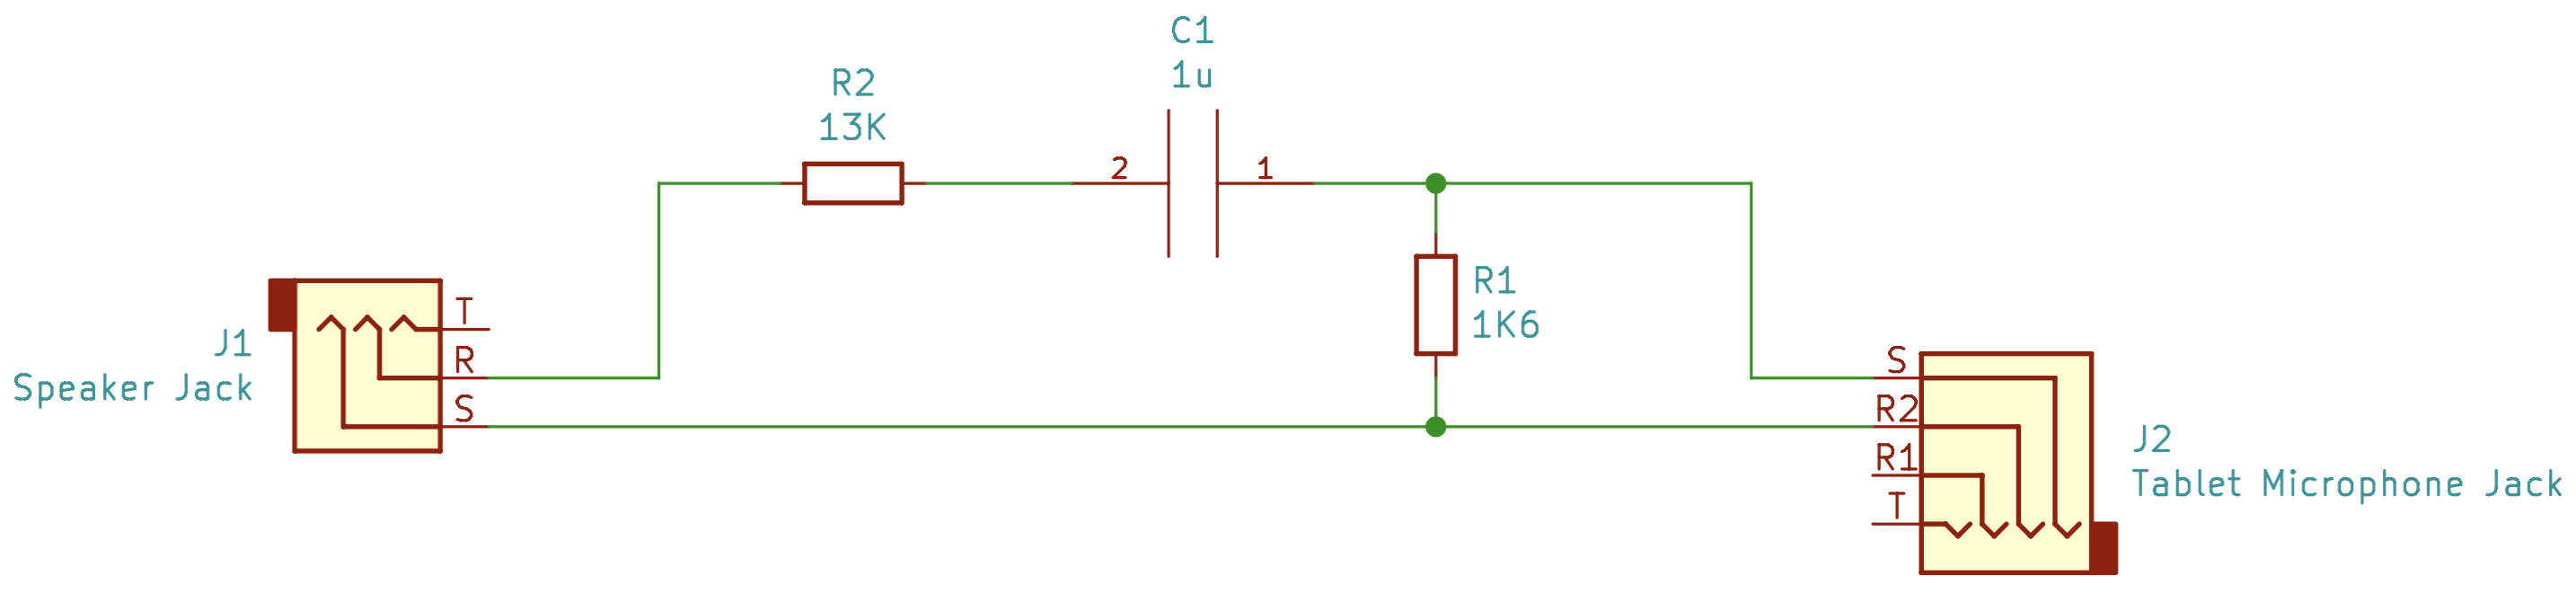
R1 has to be 1.6kΩ in order to make the iPad conclude an external microphone is connected. Without this the iPad will use its internal microphone and not listen to the mic input.
The ratio of R2 and R1 is chosen to divide down the default output of the Tecsun headphone jack (about 4V at the default volume level) to the 40mV the iPad expects to see from a microphone. 13kΩ works well here.
C1 exists to couple AC signals to cross two different DC voltage domains. The radio is outputting its own 4V waveform expecting to drive a set of headphones. The tablet is outputting 1.5-2.5V in order to sense the microphone resistance and to power any microphones that require it. C1 will add our divided down radio output to this DC level so it looks like a microphone input.
We can calculate the value of C1 knowing we have to drive 1.6kΩ load and the frequency of the driving signal. The frequencies present in the weather fax are 1500 Hz for black and 2300 Hz for white. Viewing the circuit as a filter, we need the time constant CR to be longer than the period of the lowest frequency we want to pass.
CR = 1/F
R =1600 Ω
F =1500 Hz
C = 1/RF = 1/(1600 x 1500) = 0.42µF
Choose 1uF as a convenient value above this.
Cut and strip the cables. Use a multimeter to work out which strand of the cable connects to which ring on the jack plugs. With that information you can build the circuit above.
In my case I found
TRS cable from the radio (in from left in photo below and circuit diagram above) was coloured as follows
Tip (Left Speaker) Red
Ring (Right speaker) White
Sheath (Ground) Braid. The braid I insulated with heat shrink cable so its black in the picture below.
The TRRS cable out to the tablet (on the right in photo below and circuit diagram above) in my case was colour coded as follows. The two no connects might seem odd but remember this cable was bought to be a microphone input breakout cable.
Tip (Right Speaker) - No connection
R1 (Left Speaker) - No connection
R2 (Ground) - Braid
Sheath (Microphone) - Red and white
So in my case the circuit above was implemented by soldering on the resistors and capacitors on and insulating with shrink tubing like this
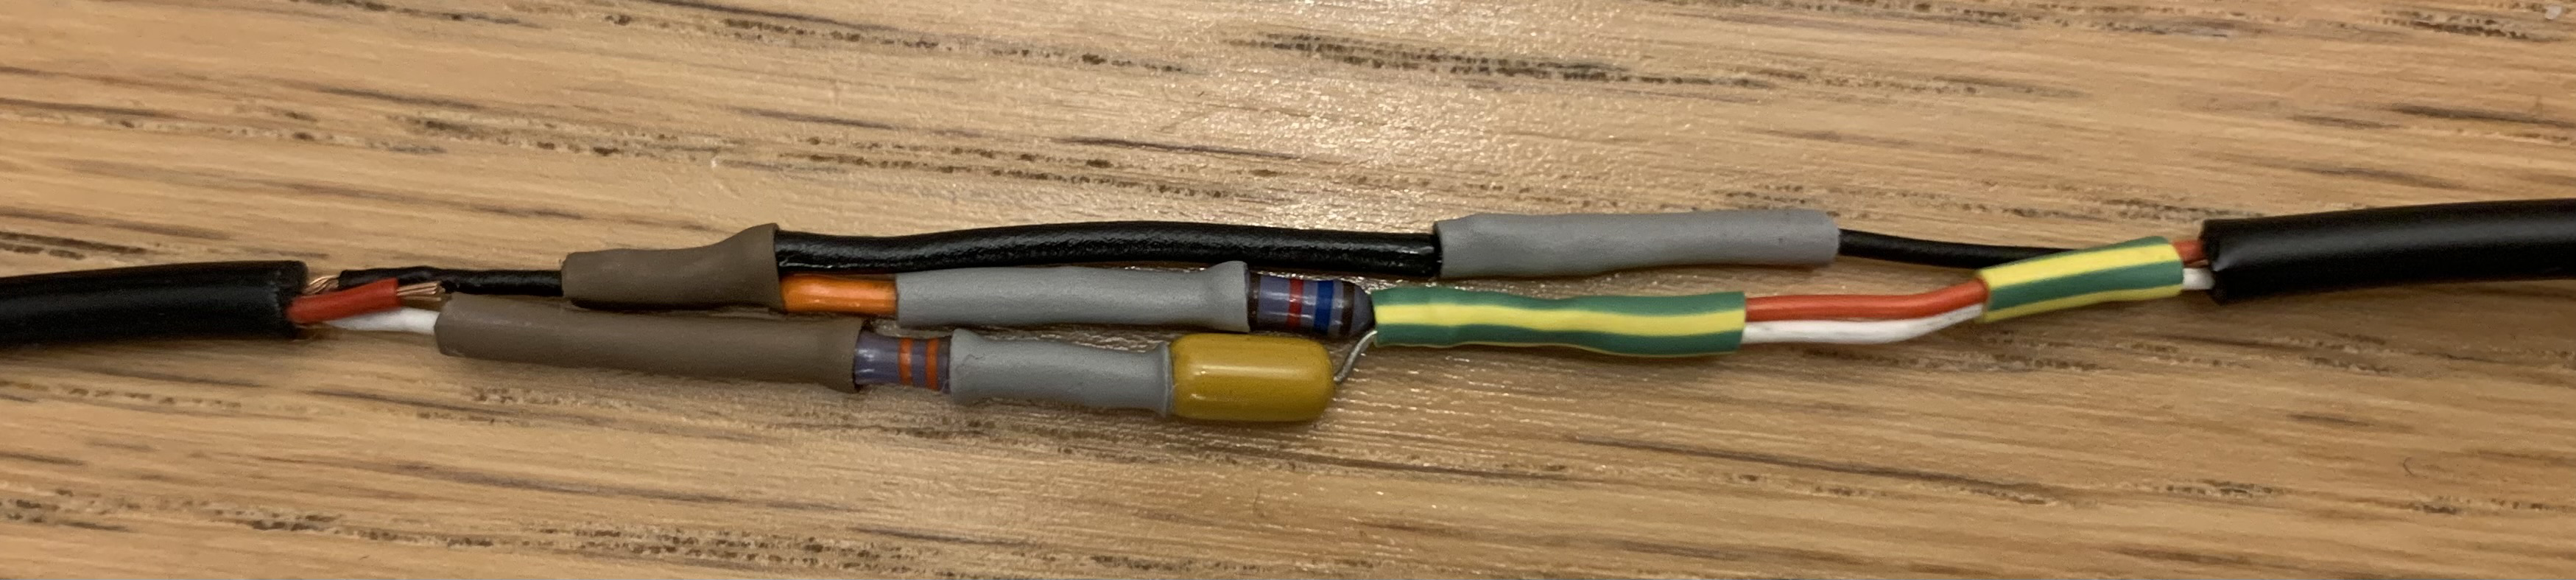
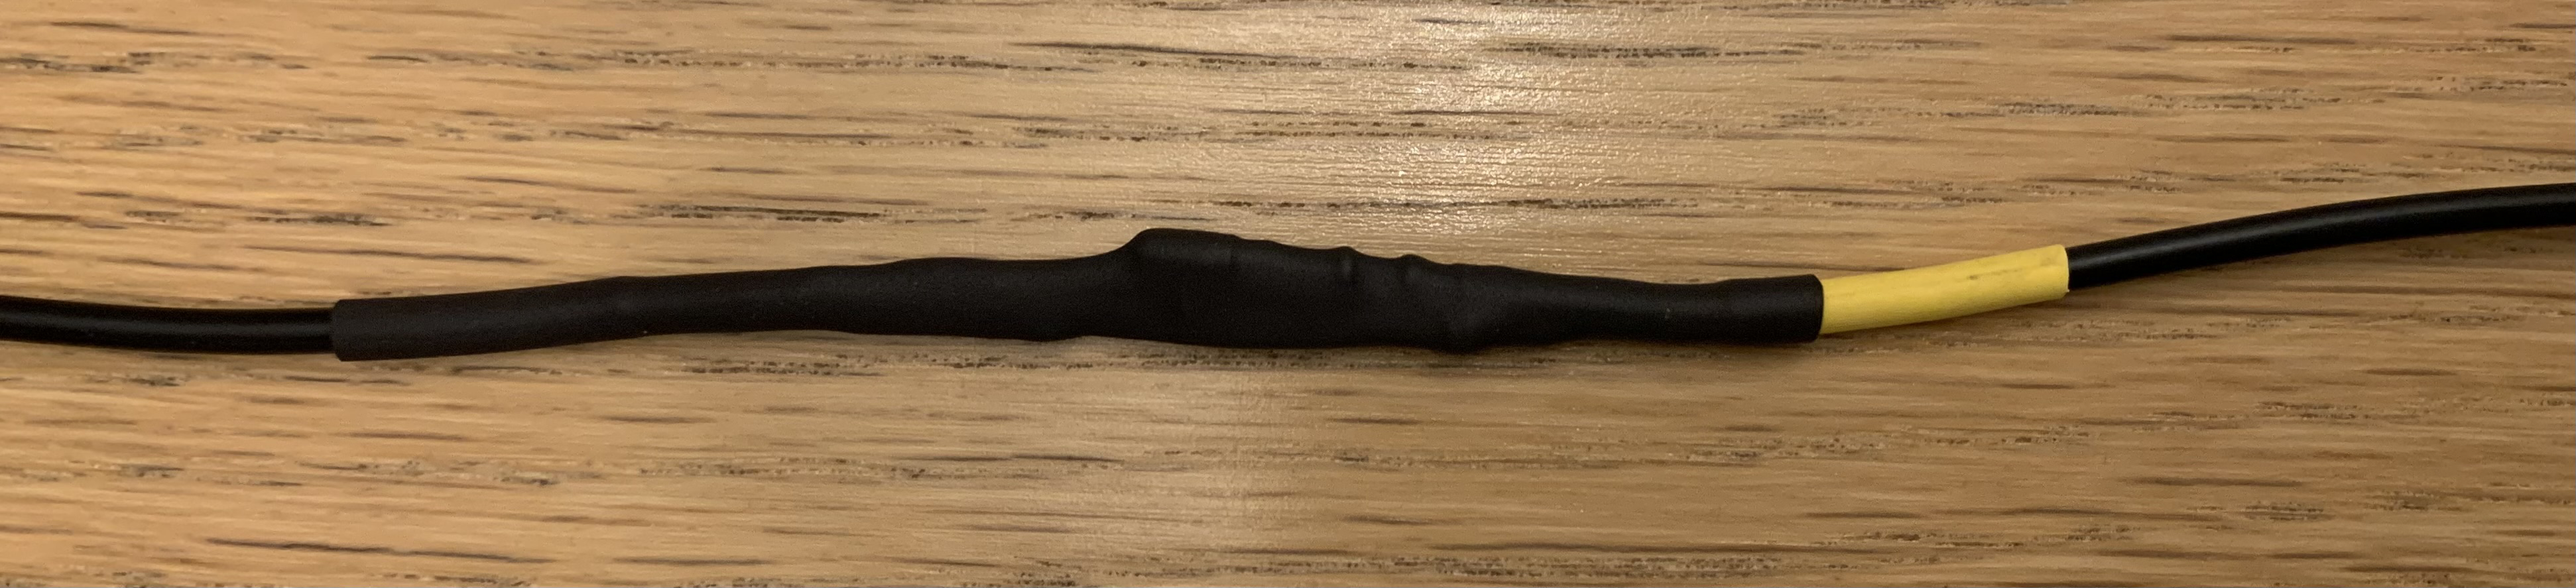
Then we can add more shrink tubing over all components to leave a tidy cable.
Connect the radio headphone out to the iPad headset jack using this new lead and move on to the software and radio.
Install the Black Cat HF Weather Fax application from the app store. I found it just worked provided the radio was tuned correctly and atmospheric conditions favourable for reception.
This link lists the frequencies and schedules for the Weather Fax service globally.
https://www.weather.gov/media/marine/rfax.pdf
In the south of England I found transmissions some days on 8040, and on other days on 7880 (the Hamburg transmitter). In both cases I got best results selecting the upper side band on the radio and tuning about 1.5kHz below the published frequencies.
Specifically I used 8038.5 and 7878.4. By default the charts by default came out slightly slanted, but the HF Weather Fax has an option to correct this. I used a correction of -5 when tuned to 8038.5, and a correction of +9 when tuned to 7878.4.
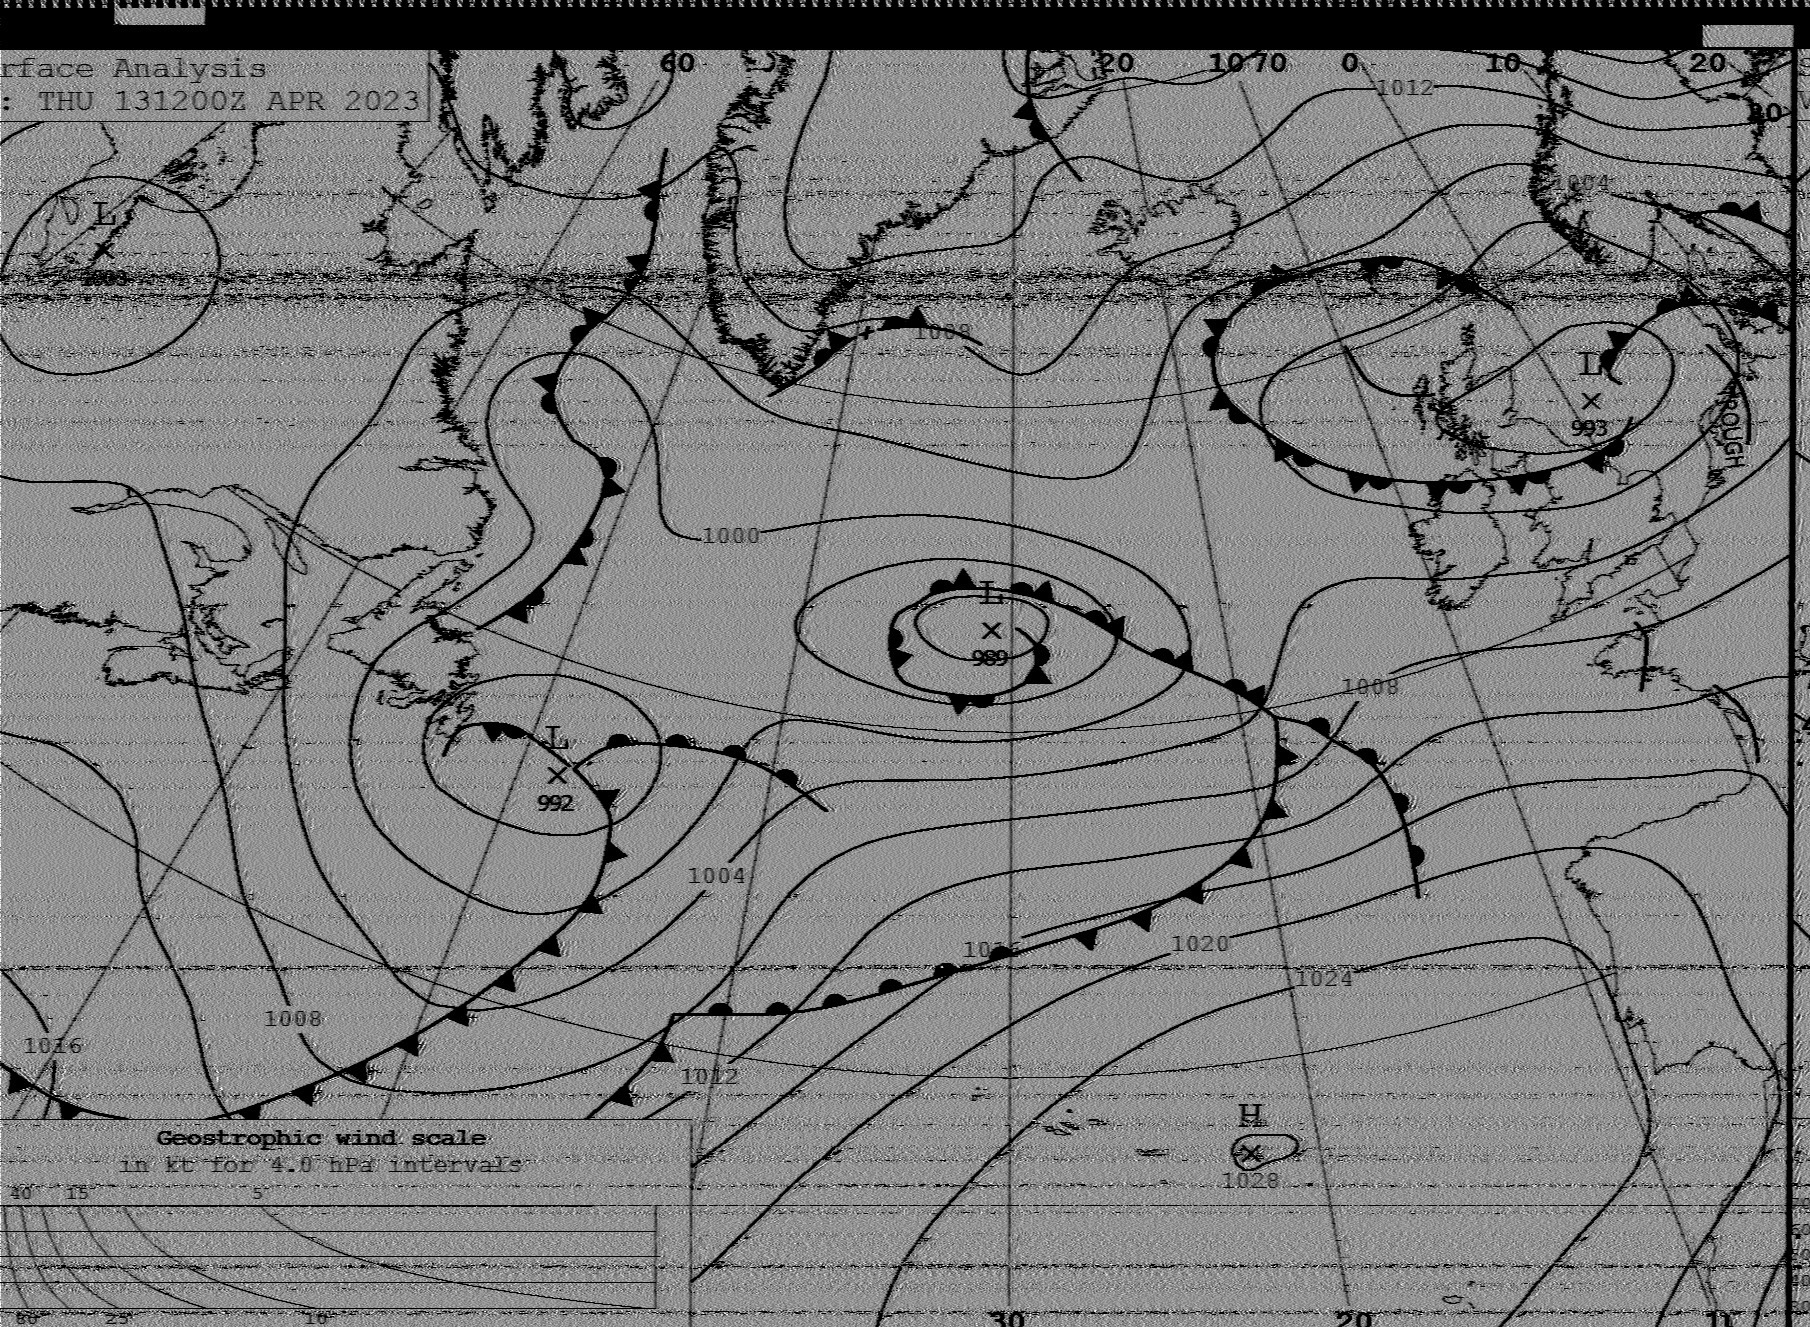
HF Weather Fax detects the start of each new map and saves the old ones in a gallery for you to review later if you simply leave it running.
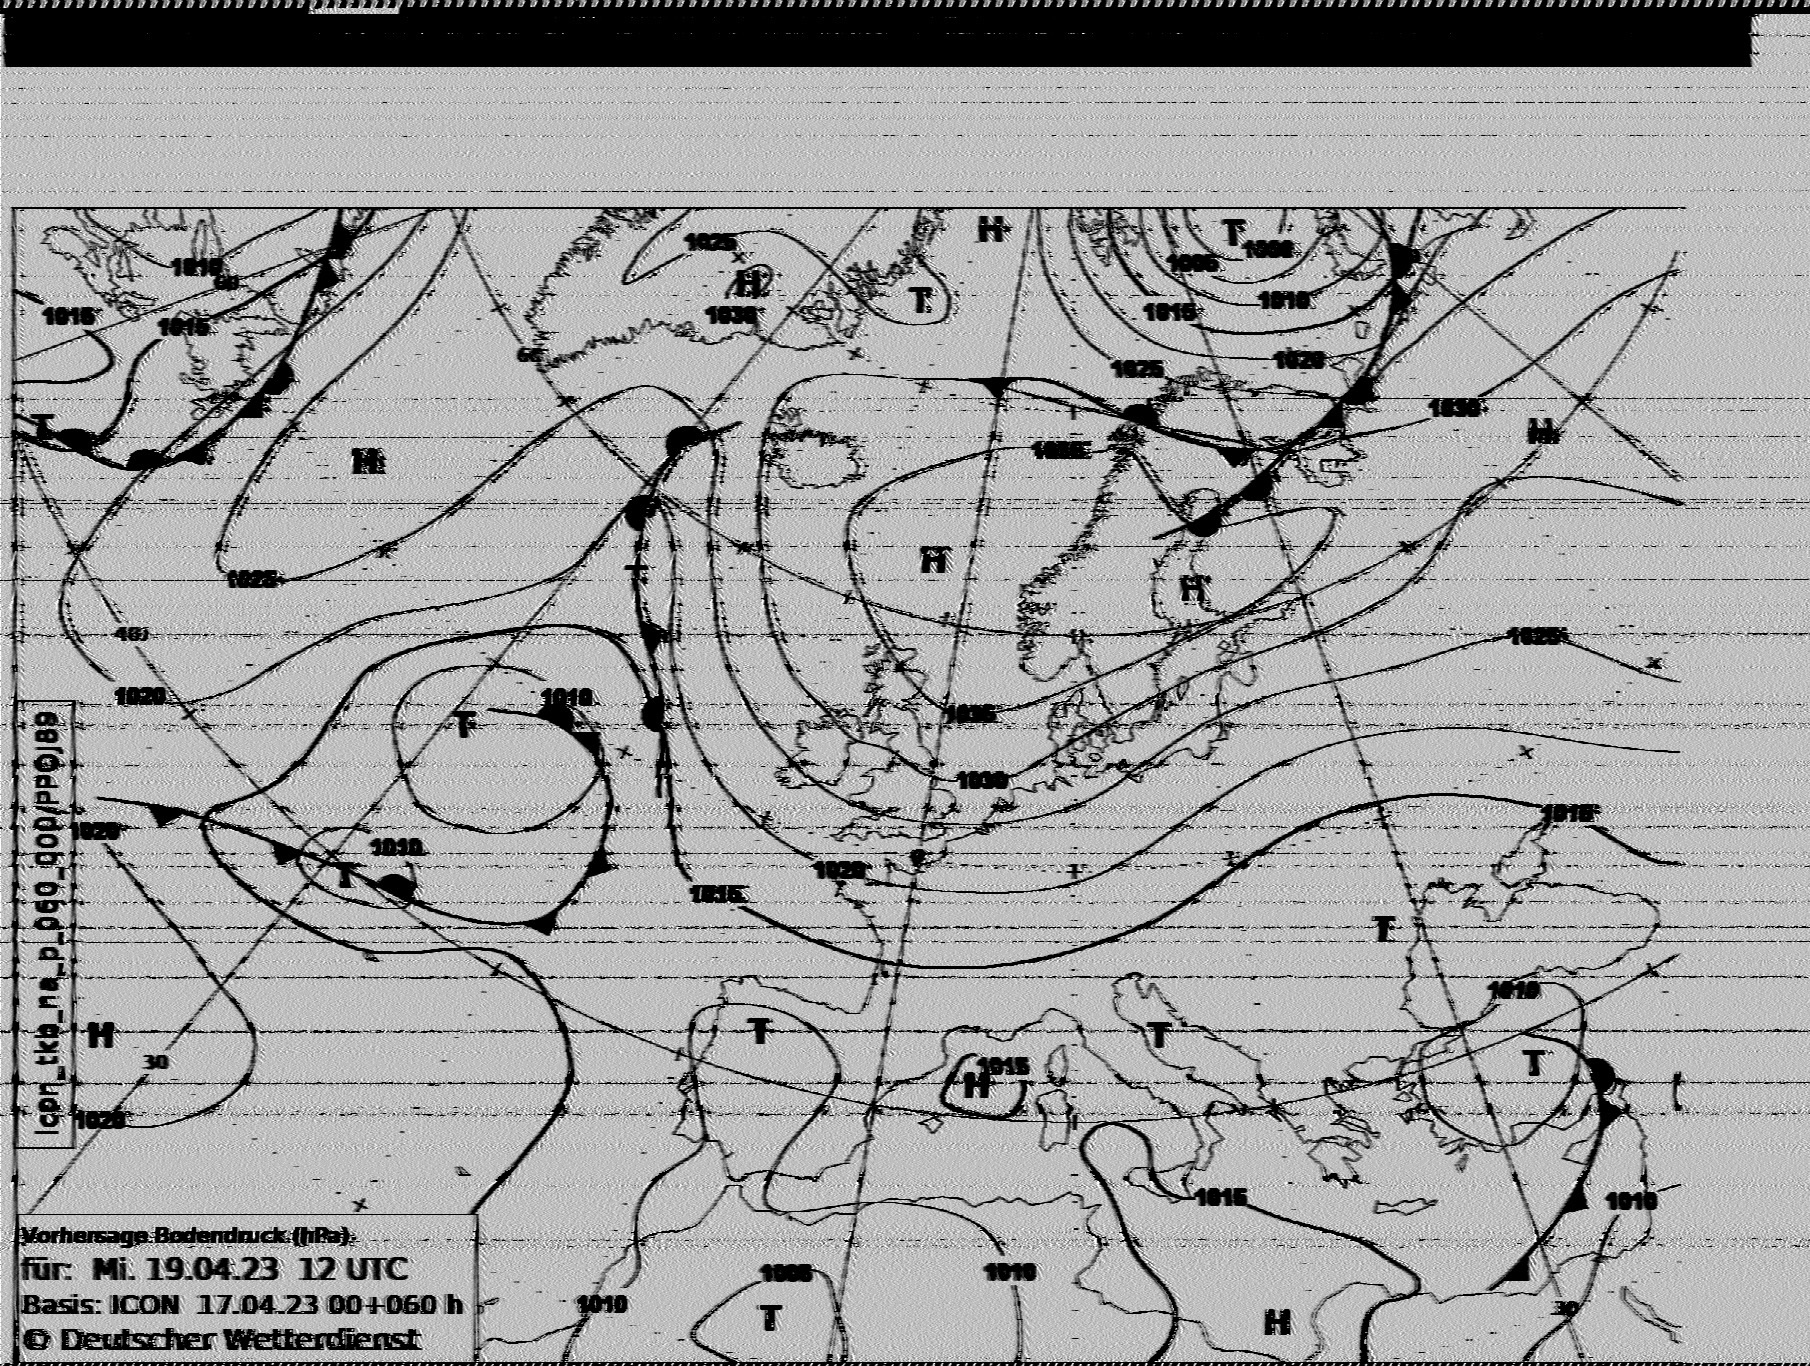
Here is an example chart from the Hamburg transmitter in Germany received in southern England.
And below an example from the Northwood transmitter in the UK